


Introduction :
Making a WordPress website from scratch using a WordPress Theme: Are you considering building a website? You don't need to look for a developer or spend time learning coding skills. We have a solution that even beginners can use to create a WordPress website without coding skills.WordPress is the ultimate solution for your website design issue. It is the most beautiful platform for creating websites.Now, you can use WordPress to build a website or blog for almost every niche. It is a widely used platform for creating websites with easy-to-use features.
Again, you might have wondered how this is possible. We will depict this in the article below. Let's have a look.
Steps to Create a Website Using WordPress Theme:
Below is the step-by-step guide for beginners who choose to design their personalized website.
Step 1: Choose a Web Hosting Platform
Step 2: Register a Domain
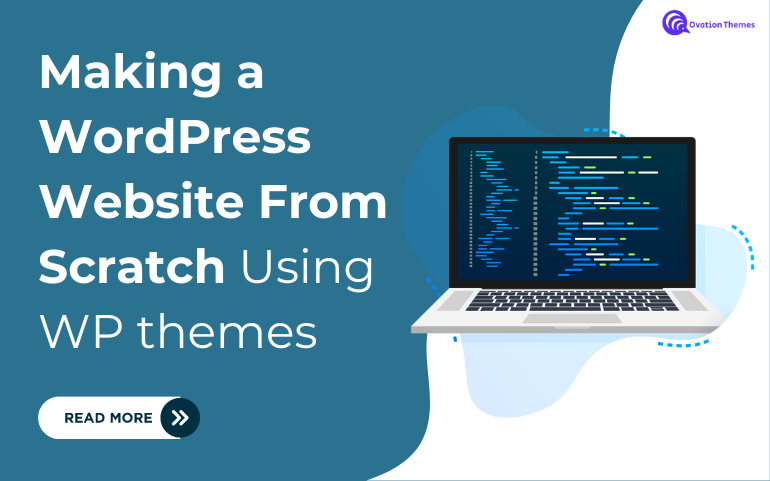
Step 3: Install WordPress
Step 4: Choose a WordPress Theme
Step 5: Install templates and customize your website's design
Step 6: Create posts and pages
Step 7: Add Plugins
Step 8: Optimize your website for speed
Step 9: Market your website
Step 1: Choose a Web Hosting Platform
The first step in making a WordPress website from scratch is to base it on a powerful web hosting platform. A web hosting platform is a personal space for the website to store files and data. It provides a server where all your website data is stored.
It is vital to set up your website because the primary factors rely on web hosting. A web host will give your website speed, security, and reliable features.
You will find many web hosting providers that are even free to use. However, the chosen web host must support the latest WordPress versions and HTTP. Therefore, we are moving to one of the best web hosts, Bluehost, with features.
Bluehost is one of the finest web hosting platforms which is beginner-friendly and cost-effective. Another quality is that it provides a free domain name with a purchasing plan.
- Visit the Bluehost website and tap the Get Started button.
- The next page will display various pricing plans. You need to figure out the most suitable plan that fits your needs. At the same time, we recommend choosing the basic strategy at $1.99/ month. This is the most affordable plan for a startup with a free domain name.
- Once you have selected the pricing plan, you will reach the next step: choose the domain name.
Step 2: Register a Domain
Since you have chosen the web hosting plan, it's time to go for a good domain name for your website. After you have chosen the pricing plan, the next page will let you select a domain name for your website.You might have seen so many suggestions on choosing domains like ".com", ".co", ".in," and more. Using the ".com" extension is highly recommended as it seems professional. Also, you must follow some essential factors while choosing the right domain name for your site:
- Keep your domain name short and related to your company.
- It should be easy to pronounce.
- It would help if you used keywords in your domain.
- Avoid using special characters in your domain.
This should be the common criterion when choosing a domain name. While on the web hosting platform, you are given various options. You can either choose from there or form a unique one.
- After selecting the domain, tap the “Next” button, and you will reach the payment page to complete the purchase.
- Once you have purchased and added the details, you will receive an email with the login credentials.
- You can now log in to your web hosting control panel from the dashboard area. This will direct you to install WordPress.
Step 3: Install WordPress
Next, you can sign up for the Bluehost account using the login credentials and the link. WordPress has already been installed once you tap the link to log in. Making a WordPress website from scratch using a single-click WordPress installer for beginners without technical knowledge.
In case you want to follow the manual procedure, you can use the below steps:
- On the Bluehost dashboard, tap the "My Sites" button and then on the "Add Site".
- On the new page, Press the "Create Site" button.
- You will then be taken to the page to enter the login credentials provided via email.
- Once you have entered the details, WordPress will be installed immediately.
- You will now reach the WordPress Dashboard and can start defining your website correctly.
Step 4: Choose a WordPress Theme
Now that you have WordPress installed, it's time to customize the website with a unique theme and templates. Themes define the overall appearance of the website. They help shape the website in the same way you imagined, and you can easily change the whole appearance of the website by changing the theme. You just need to choose the theme you like for creating a website on WordPress.
WordPress offers many professional WordPress themes, including free and premium ones. Free themes are available on the WordPress.org page, and premium themes can be found on third-party platforms. Third-party platforms offer both free and premium services.
Theme selection is crucial to apply to the website design, but you have to do it as it can effectively range up the value in appearance and functionality.
Vital Factors to Choose WordPress Theme for Your Website:
- The theme design should be clean and minimal.
- It should be responsive enough to fit on all screens.
- SEO optimization is a vital factor to consider.
- It should be compatible with other plugins as well.
- Customization is a significant factor to consider as it helps in giving a unique appearance.
- It should be in the latest WordPress versions and sound documentation.
- Customer support should be a factor to consider.
- Also, it would help if you watched out for the reviews and ratings.
This is how you can make a good theme selection for making a WordPress website from scratch. Now, we are moving towards installing the steps of the selected theme.
All the above-mentioned factors are meticulously integrated into Ovation Themes. With a clean design, they offer best minimal wp themes that ensure your website looks professional and appealing on any device, thanks to their responsive layout. They are fully SEO optimized, making it easier for your website to rank higher in search engine results. Additionally, Ovation Themes are compatible with a wide range of plugins, offering you the flexibility to enhance your site's functionality. Customization options are abundant, allowing you to create a unique appearance that stands out. Moreover, these themes are always up-to-date with the latest WordPress versions and come with comprehensive documentation. Exceptional customer support and positive reviews further affirm the reliability and quality of Ovation Themes, making them an excellent choice for your website.
Steps to Install Theme:
- Reach the WordPress dashboard and tap the “Appearance” option.
- Next, choose the “Themes” tab.
- You will be taken to a page and then have to press the “Add New” button.
- A collective space of standard themes is available to install on the themes page.
- You can choose from them or search for the desired theme in the search bar. Once you have found the desired theme, tap the “Install” button and click the “Activate” button.
- Or else if you can directly upload your required theme zipped folder by clicking on upload button.
- You are now ready to move further with customization and adding templates.
Step 5: Create Posts and Pages on the Website
The next step is to add content representing the brand you are designing for a website. In WordPress, content is depicted in the form of posts and pages. Posts are elements used for blogging and portfolios. They are uploaded to the website, and the last ones uploaded are shown first. Creating essential pages is very important step in making a WordPress website from scratch.
While the pages are the static pieces of the website that mostly stay the same without any changes, these include the About Us page, Contact details, Privacy policy, and more. You can easily add content by adding posts and other website pages.
WordPress allows one to create fantastic posts and pages by following the below steps.
Adding Pages to Website:
- Reach the WordPress dashboard area and tap the "Pages" section.
- Then, select the "Add New" option, and you will reach the "Page Editor" section, where you can customize it.
- You can then add a title for the page by simply clicking on the "Add Title" area.
- Similarly, you can add more elements like images, tables, videos, headings, buttons, etc. Press the "+" icon on the top left corner, and it will open the blocks to add to the page.
- After adding all the necessary elements, you must tap the "Publish" button to save the changes on the page.
Adding Posts to Website:
- Take your mouse cursor to the "Posts" section of the WordPress dashboard.
- Then, select the "Add New" option.
- You will be taken to the editor screen to find the elements required for the post quickly.
- Like the page, you can add titles, categories, and tags to the posts. You can add various blocks by tapping the "+" icon.
- You can customize the added elements by clicking "block or element."
Step 6: Customize the Site's Design
Your chosen theme has been successfully installed on your website. Now, it's time to tweak its features and customize them according to your needs for making a WordPress website from scratch.
We will initiate the customization of the homepage.
- To do this, toggle your mouse to the "Settings" tab and then to the "Reading" option in the dashboard area.
- You will find the "Front Page Display" section. You need to choose the "Static" Page. Then, select the page you created for home and blogs.
- Next, tap the "Save Changes" button to store changes. Now, you will see the title of the page and the posts you have titled.
After setting the homepage, you can now customize the Title and Tagline.
- To set the Title and tagline, move your mouse cursor to the "Settings" tab and select “General”.
- On the general settings page, you can change the website title and tagline. The title is set by default to your website name. You can even leave the tagline area blank if you don't wish to add a tagline.
- Once done adding the title and tagline, tap the "Save Changes" button.
Next, we will configure the comments settings.
- Comments are a great feature provided by WordPress, allowing end users to add comments on posts. But this can lead to spam comments. So, to make this right, you can configure the settings.
- Hover your mouse pointer to the "Settings" section of the WordPress dashboard and tap the "Discussion" option.
- Move your mouse pointer down on the settings page in front of the "Before Comment Appears".
- Check the box near the "Comments must be manually approved".
- Lastly, tap the "Save Changes" button at the bottom.
The following setting is to add the Navigation menus.
- The most vital part of the website is to add the navigation menus. It allows you to browse or reach any part of the website in less time with a few clicks and makes the WordPress site faster. WordPress conquers this feature to add navigation menus on the website easily. To add navigation menus, look at the steps below:
- Initially, it would help if you visited the "Appearance menu" in the WordPress dashboard.
- Then, tap the "Menus" option to reach the Menu creation page.
- Type the name of your menu and tap the "Create Menu button" at the bottom. This will create an empty menu for you.
- Next, you need to choose pages or posts to add to the menu. To do this, select the pages from the left side and then tap "Add to Menu."
- You can even rearrange the position of the pages along with their location to display in the menu.
- Lastly, pressing the "Save Changes" button would be best.
Step 7: Installing Plugins
Plugins are tiny software elements that help raise the functionality of the website for making a WordPress website from scratch. They are available for every feature of the website you wish to add. Additionally, plugins boost the website's user experience. Currently, almost 59000 plugins support every feature on your website. You can quickly get this on your site by pressing the Plugins option under the WordPress dashboard.
Here is the list of significant plugins you can use on your website to improve functionality.
- WPForms plugin - This plugin is used to build contact forms to collect the vital details of the end users.
- MonsterInsights - This is the best Google Analytics plugin for analyzing users' behavior.
- SeedProd - One of the finest page builder plugins that supports the powerful drag-and-drop feature for creating websites.
- All-in-one-SEO - The best SEO-boosting plugin to acquire good SERP ranks and traffic.
- UpdraftPlus - Apply automatic backups on your website.
- Sucuri - Apply security measures on your website using the Sucuri plugin.
- Woocommerce - This is one of the finest ecommerce plugins for WordPress.
- WP Simple Pay - Add credit card payments on your website.
Step 8: Optimize Your Website for Speed
Coming to the most vital part of the website is to make WordPress site faster or optimize the website for speed. Your newly designed website must load quickly as it can easily grab new visitors. A slow-loading website can frustrate users and cause them to leave your site within seconds. This should not happen, so you must optimize your website by applying browser caching. This is the best way to boost the speed of your website.
Ultimately, your website data is sent to another location, clearing the actual place.
This will help boost the speed as the content request will only be sent to the server sometimes. However, WordPress does not allow direct caching in its in-built features. You need to install caching plugins for this.
Step 9 - Market your Website
Then comes the last part of website design: e-ticketing marketing is the most effective way to get a valuable place in the digital world. While making a WordPress website from scratch, you must apply marketing practices to get quickly recognized in the market world.
To boost visibility, you must rely on the following marketing practices:
- You must register your website on the Google Search Console for good ranks.
- Create social media accounts for your brand on Instagram, Facebook, and Pinterest.
- Get your website engaged with online directories like Yelp and Yellow Pages.
- You must form a "My Business account" to be easily visible on local searches.
Conclusion
In conclusion, making a WordPress website from scratch using WP themes is an empowering and rewarding experience. By following a step-by-step approach, you can build a site that not only meets your aesthetic preferences but also functions smoothly across all devices. Choosing the right theme is crucial, as it sets the foundation for your website's design, usability, and overall user experience. Opting for a theme that is responsive, SEO-friendly, and easily customizable ensures that your website stands out in the crowded digital landscape.
For those who want to take their website to the next level, the WordPress bundle is an invaluable resource. This bundle provides access to a diverse collection of premium themes, each designed to cater to various industries and niches. With the bundle, you can experiment with different layouts, color schemes, and features without worrying about compatibility or performance issues. Moreover, the bundle is continually updated to include the latest trends and functionalities, ensuring that your website remains modern and relevant.
Whether you're building a blog, an online store, or a business website, the WordPress theme bundle offers the flexibility and versatility needed to bring your vision to life. It's a cost-effective solution that allows you to create multiple websites with ease, making it ideal for entrepreneurs, freelancers, and agencies alike. By leveraging the power of this bundle, you can save time, reduce costs, and ensure that your website is built on a solid foundation that can grow and evolve with your needs.