


In today's digital age, establishing an online store has evolved into a highly accessible and profitable endeavor. With the appropriate tools and platforms at your disposal, crafting an appealing and efficient online store website to exhibit and market your products or services has never been easier. In this comprehensive guide, we'll navigate you through the process of crafting your very own online store website utilizing WordPress, renowned as the leading website-building platform worldwide. From inception to execution, we'll unravel the steps required to fashion a captivating and operational online store, empowering you to tap into the vast opportunities presented by e-commerce in today's digital landscape.
What to Add in an Online Store Website?
Before embarking on the journey of creating your online store website, it's crucial to grasp the fundamental elements required for its success. Typically, an online store website necessitates various essential components to effectively showcase and vend your products or services. These key elements encompass comprehensive product listings, well-organized categories to streamline browsing, a seamless shopping cart functionality for effortless transactions, secure payment gateways to facilitate monetary transactions, and a user-friendly interface designed to ensure intuitive navigation for visitors. By incorporating these indispensable elements into your online store website, you can establish a robust foundation for attracting customers, fostering trust, and optimizing the overall shopping experience, thereby positioning your business for success in the competitive world of e-commerce.
Steps to Make Online Store Website with WordPress
Step 1: Choose an Attractive Store Name
Choosing a catchy and memorable name to make online store website is crucial as it sets the tone for your brand and helps you stand out in the crowded online marketplace.
- Reflect Your Brand Identity: Consider the core values, mission, and unique selling points of your brand. Your store name should align with these elements and communicate them effectively to your target audience. For example, if you're selling handmade crafts, a name like "Artisan Haven" or "Crafty Creations" could reflect the handmade, artistic nature of your products.
- Resonate with Your Target Audience: Think about the demographic you're targeting and what resonates with them. Conduct market research to understand their preferences, interests, and language. Your store name should speak directly to your target audience and evoke positive emotions or associations. For instance, if your target audience is fitness enthusiasts, a name like "FitFusion Gear" or "ActiveWear Hub" could appeal to them.
- Keep it Catchy and Memorable: Choose a name that is easy to remember, spell, and pronounce. Avoid complex or obscure words that may confuse potential customers. Short, snappy names tend to stick in people's minds better. Utilize alliteration, rhymes, or puns to make your name catchy and memorable. For example, "GadgetGalaxy" or "BakeBliss Boutique" are both memorable and catchy.
- Consider Domain Availability and SEO: Check the availability of your chosen name as a domain to ensure consistency across your online presence. A domain name that matches your store name makes it easier for customers to find you online. Additionally, consider incorporating relevant keywords into your store name to improve search engine visibility. For example, if you're selling organic skincare products, including "organic" or "natural" in your store name can enhance its SEO value.
- Trademark Considerations: Before finalizing your store name, research whether it's already trademarked or being used by another business in your industry. You want to avoid legal issues and confusion with competitors.
Step 2: Sign Up for a Hosting Provider
Selecting a reliable web hosting provider is crucial for to make online store website as it directly impacts performance, security, and overall user experience. Here's an elaboration on some popular options:
- Hostinger: Hostinger is known for its affordability and reliability. They offer various hosting plans suitable for different needs, including shared hosting, VPS hosting, and cloud hosting. Hostinger provides excellent uptime guarantees and fast loading speeds, which are essential for e-commerce websites. Additionally, their customer support is responsive and knowledgeable, assisting users with any technical issues or inquiries.
- Wix: Wix is a best WordPress page builder that also offers hosting services. It's known for its user-friendly drag-and-drop interface, making it easy for beginners to create professional-looking websites without coding skills. Wix hosting includes features such as reliable uptime, SSL security, and built-in SEO tools to help improve website visibility. However, compared to traditional hosting providers, Wix's customization options may be somewhat limited.
- 000webhost: 000webhost is a free web hosting provider that offers basic hosting services suitable for small websites and personal projects. While it's an attractive option for those on a tight budget, it may not be the best choice for an online store due to potential limitations in terms of resources, performance, and support. Free hosting services often come with advertisements and restrictions, which can impact the professionalism and functionality of your e-commerce website.
When choosing a web hosting provider for your online store, consider factors such as uptime guarantees, loading speeds, security features, scalability options, customer support quality, and pricing. It's essential to select a provider that can meet your current needs and accommodate future growth as your business expands. Additionally, read reviews and compare features to make an informed decision based on your specific requirements and budget constraints.
Step 3: Install WordPress
To install WordPress, follow these steps:
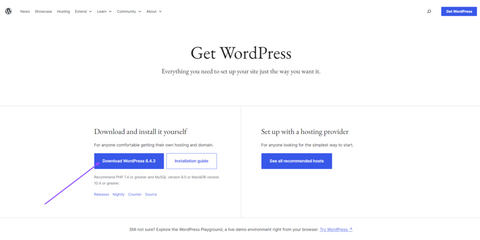
- Select a web hosting provider that meets your needs. Popular options include Bluehost, SiteGround, and HostGator.
- If you don't have a domain name yet, register one through your chosen web hosting provider.
- Sign up for a hosting account with your chosen provider. This usually involves selecting a hosting plan and providing payment information.
- Log in to your hosting account and access the control panel, typically using a link provided by your hosting provider.
- In the control panel, look for an option to install WordPress. Many hosting providers offer one-click installation tools like Softaculous or QuickInstall.
- Click on the WordPress installer and follow the prompts to begin the installation process. You will need to choose the domain where you want to install WordPress and set up an admin username and password.
Let's move to the next step of how to make online store website.
Step 4: Install and Configure WooCommerce
To install and configure WooCommerce, follow these steps:
1. Install WooCommerce Plugin:

- Log in to your WordPress dashboard.
- Navigate to "Plugins" > "Add New."
- Search for "WooCommerce" in the search bar.
- Click "Install Now" next to the WooCommerce plugin.
- After installation, click "Activate" to activate the plugin.
2. WooCommerce Setup Wizard:
- Upon activation, WooCommerce will launch the setup wizard.
- Click on "Let's Go" to begin the setup process.
3. Page Setup:
- The setup wizard will prompt you to create necessary pages for WooCommerce, such as Shop, Cart, Checkout, and My Account.
- Click "Continue" to generate these pages automatically. If you already have these pages, WooCommerce will use them.
4. Store Location:
- Enter your store's location details, including country, address, and currency.
- Click "Continue" to proceed.
5. Shipping and Tax:
- Configure shipping options by selecting your preferred shipping methods and setting up shipping zones.
- Set up tax options based on your store's location and tax requirements.
- Click "Continue" to move on.
6. Payment Options:
- Choose the payment gateways you want to offer to your customers. Options may include PayPal, Stripe, credit card, bank transfer, etc.
- Configure payment settings for each selected gateway.
- Click "Continue" to proceed.
7. Recommended Add-ons:
- WooCommerce may recommend some add-ons based on your store's needs. You can choose to install them or skip this step.
- Click "Continue" to move forward.
8. Ready!:
- Once you've completed all the steps, WooCommerce will display a confirmation message indicating that your store is ready.
- Click "Create your first product" to start adding products to your store.
9. Configuration Settings:
- After completing the setup wizard, you can further configure your store settings by navigating to "WooCommerce" > "Settings."
- Here, you can customize various aspects of your store, including general settings, products, taxes, shipping, and payment gateways.
10. Add Products:
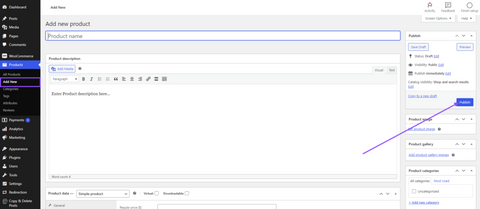
- Start adding products to your store by navigating to "Products" > "Add New."
- Fill in the product details, including title, description, price, images, and categories.
- Click "Publish" to make the product live on your store.
Step 5: Choose an Online Store Theme
Select a visually appealing and responsive theme for your online store. There are numerous WordPress themes designed specifically for e-commerce websites, offering customizable layouts and features. Ovation themes provides best themes to make online store website. Let's check some of them:
1. Woocommerce Storefront Theme:

The WooCommerce Storefront Theme by Ovation Themes is a versatile and feature-rich WordPress theme designed specifically for online stores. With its clean and modern design, Storefront offers a visually appealing and user-friendly shopping experience for both store owners and customers. Built with WooCommerce compatibility in mind, this theme seamlessly integrates with the popular e-commerce plugin, allowing you to create a fully functional online store with ease. Storefront comes with a range of customizable options, including multiple layout options, color schemes, and typography settings, allowing you to personalize your store to match your brand identity. Additionally, the theme is optimized for performance and SEO, ensuring fast loading times and improved search engine visibility for your online store. Whether you're selling physical or digital products, the WooCommerce Storefront Theme provides the perfect foundation for building a successful e-commerce website.
2. Shopkeeper WordPress Theme:

The Shopkeeper WordPress Theme by Ovation Themes is a premium e-commerce theme designed to help you create stunning online stores with ease. With its modern and elegant design, Shopkeeper offers a professional and visually appealing storefront that attracts customers and drives sales. The theme is fully compatible with WooCommerce, the leading e-commerce plugin for WordPress, allowing you to easily set up and manage your online store. It is a perfect choice to make online store website. Shopkeeper comes with a wide range of features and customization options, including multiple homepage layouts, customizable headers and footers, and unlimited color schemes. It also includes advanced e-commerce functionalities such as product quick view, shopping cart, and product filtering options, providing a seamless shopping experience for your customers. Whether you're a small boutique or a large online retailer, the Shopkeeper WordPress Theme offers everything you need to create a successful e-commerce website.
Step 6: Install Additional Plugins
To install additional plugins on your WordPress website, follow these steps:

- Enter your username and password to access the dashboard of your WordPress website.
- On the left-hand side menu, hover over "Plugins" and click on "Add New."
- In the search bar at the top right, type the name or functionality of the plugin you want to install.
- Hit Enter, and WordPress will display a list of plugins matching your search criteria.
- Scroll through the list of available plugins or use filters to narrow down your search by criteria such as featured, popular, recommended, or specific categories.
- Once you find the plugin you want to install, click on the "Install Now" button next to it.
- After installation, the "Install Now" button will change to an "Activate" button.
- If you have downloaded a plugin from a third-party source, you can manually upload and install it.
- Navigate to "Plugins" > "Add New" and click on the "Upload Plugin" button at the top.
- Choose the plugin file (.zip format) from your computer and click "Install Now." After installation, click "Activate" to activate the plugin.
- Navigate to "Plugins" > "Installed Plugins" and locate the plugin you installed.
- Click on "Settings" or "Configure" (if available) to access the plugin settings and make any necessary adjustments.
- Navigate to "Plugins" > "Installed Plugins" and look for any plugins with available updates.
- Click on "Update Now" to update the plugin to the latest version.
Take the Necessary Steps to Grow Your Online Store Website
- Ongoing optimization and promotion are crucial for the success of your online store website.
- Implement search engine optimization (SEO) strategies to improve your website's visibility on search engines and drive organic traffic. Make online store website excel in the search result rankings.
- Engage in social media marketing to interact with your audience, build relationships, and promote your products or services across different platforms.
- Utilize email campaigns to nurture leads, announce new products, and encourage repeat purchases from existing customers.
- Leveraging these digital marketing channels can help increase brand awareness and attract more visitors to your online store.
- Continuously monitor your website's performance and analyze customer behavior to identify areas for improvement.
- Adapt your marketing strategies accordingly to ensure sustained growth and success in the competitive e-commerce landscape.
Conclusion:
In conclusion, when you make online store website with WordPress, it offers a powerful and flexible solution for entrepreneurs looking to establish their e-commerce presence. By following the steps outlined in this guide, you can build a professional and functional online store that attracts customers and drives sales.
From selecting a catchy and memorable name that reflects your brand identity to choosing a reliable web hosting provider, every aspect of the process is essential for success. Utilizing WordPress's vast ecosystem of plugins and themes allows you to customize your store to meet your specific needs, whether it's integrating payment gateways, optimizing for mobile responsiveness, or enhancing security measures.
Remember to prioritize user experience throughout the design and development process, ensuring that your website is easy to navigate, visually appealing, and optimized for conversion. Regularly update your content, products, and promotions to keep your store fresh and engaging for visitors.
Lastly, don't forget to implement marketing strategies such as search engine optimization (SEO), social media marketing, and email campaigns to drive traffic to your online store and increase sales. With dedication, creativity, and the right tools, you can build a successful online store website with WordPress and turn your e-commerce dreams into reality.
Make your online store attractive by adding a touch of WordPress theme. Give your website a new look by using a theme from our collection. Our WordPress Bundle that consists of a collection of 70+ professional themes, crafted to serve different niches. So whatever niche you've selected for your online store, your ultimate destination if Ovation Themes. So hurry up and grab your theme now!